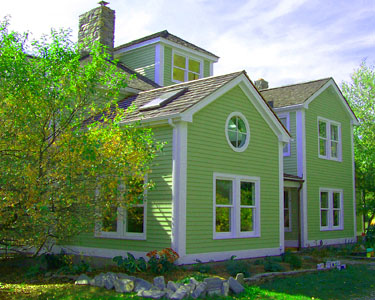

Quality Home Painting Services

Preparation
Every great-looking and long-lasting paint job must first begin with great preparation. This aspect of the job is undoubtedly the most important, and often requires even more time than the actual painting. At Green Mountain Painters, we undertake a variety of standard preparation steps to ensure that every home we paint is well-prepared to take on a fresh coat.

PRESSURE-WASHING
With most homes, we will begin the preparation with a careful, light pressure-washing. This is an important step since surface contamination can interfere with the adhesion of new coats of paint, and must be removed prior to application. We will do this a week or two prior to starting your paintjob to allow for sufficient drying time. With some homes, especially older ones or those that have an excessive amount of peeling or cracking paint, we may limit pressure washing only to areas with solid and sound surfaces. This is because indiscriminant pressure washing can do more harm than good if the surface allows the water to get in behind the siding or under loose paint layers. With these homes, we will make sure any residual surface contamination in unwashed areas is wiped clean by hand prior to painting.
MOLD/MILDEW REMOVAL
If there are any areas of a home that have mold or mildew on them, we will take care to remove and kill the growth before proceeding with painting. We will also clean the underside of gutters that have mold or mildew on them, even if we arent going to be painting them. We accomplish this by applying a mild bleach solution, scrubbing as necessary, and rinsing thoroughly. This step is completed either during the pressure washing phase of the job or first thing when we arrive to paint.
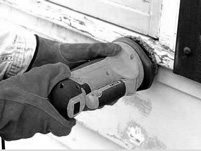
SCRAPING
Once the surface is clean we will begin the scraping phase, which is often the most labor-intensive part of the preparation process. We utilize a variety of scraping tools, depending on the type of peeling, and always make sure to remove any paint that isn't securely adhered to the substrate. All paint chips and other debris created during this process will be contained and properly disposed of.
SANDING
On older homes, we generally will not include full-body aesthetic sanding or feathering in our standard estimates. With multiple layers of old, oil and lead paint, sanding becomes unfeasibly labor-intensive, and the job would become more of a restoration project than a repainting project. More importantly, we also avoid sanding older homes to prevent releasing large amounts of lead dust into the atmosphere. We will, however, spot-sand any rough or overly weathered bare wood surfaces on these homes as part of a standard estimate, ensuring a fresh and sound substrate. On newer homes, the need for sanding depends a great deal on the type and condition of the siding. Most of the time, we will scrape most of the home, and if we uncover any rough or weathered patches of bare wood, we will give them a quick sanding as well. Sometimes however, especially with cedar-sided or other softwood homes, we will find it more effective to just sand any and all areas that are peeling, since it can be overly time-consuming to scrape failing paint off from very soft wood without damaging it. Either way, we will always ensure that all surfaces are properly prepared so the new paint will look great and last.
CAULKING/FILLING
We always caulk and seal all cracks, gaps, seams and holes in the siding with a high-quality siliconized acrylic caulk. We pay special attention to window and door frames, trim pieces, and anywhere else that water is likely to seep in if left untreated. If there is any old caulking that has degraded or come loose, we will remove it and replace it with new.
WINDOW PREPARATION & HOME MASKING
If we will be painting the windows of a home, we first remove the storm panels (if applicable), then scrape any loose or peeling paint, and replace glazing as needed. Then we prime the entire sash and window with an acrylic product called Masking Liquid H2O, which is a great primer for the wood sash, but does not stick to the glass. This product will protect the glass of your windows throughout the painting process, and easily cuts and peels off at the end of the job. If we will not be painting windows, we mask them off using tape and high density plastic sheeting to prevent any overspray from damaging them. We will similarly mask off other delicate areas of the home that we dont want to get paint on. Finally, any fixtures that can come off will be removed and then replaced at the end of the job.